
Table of Contents
- Step 1: Map Your Basement Rooms and Electrical Loads
- Step 2: Check Panel Capacity and Plan Your Basement Circuit Planning
- Step 3: Create Your Basement Wiring Diagram and Choose Cable
- Step 4: Master Basement Outlet Placement for Every Room
- Step 5: Design Your Basement Lighting Layout
- Step 6: Run Cable and Install Electrical Boxes
- Step 7: Plan for Permits, Inspections, and Future Upgrades
- Frequently Asked Questions
Last Updated: October 18, 2026
Step 1: Map Your Basement Rooms and Electrical Loads
Learning how to plan electrical layout for basement finishing starts with one rule: map the rooms before you touch a cable. More basement projects stall because the plan was drawn after the framing went up. A basement wiring plan is simply a drawing that shows every room, every outlet, every switch, and every light before rough-in wiring begins.
Here is the sequence we recommend:
- Sketch the finished floor plan to scale, including walls, doors, and windows.
- Label each room by use: bedroom, bathroom, living area, home office, storage, mechanical.
- List the loads each room needs: receptacles, lights, switches, and any dedicated equipment.
- Mark furniture placement, because a couch against a wall hides outlets fast.
- Note fixed features: a home theater wall, a bar, a treadmill, or a future sauna.
Map circuits to rooms at this stage. Group loads that run at the same time, and keep wet areas and heavy appliances on their own circuits. A load calculation follows in Step 2, but the room map feeds it directly.
Photograph the framed walls with measurements written on the studs before drywall. Years later, that photo tells you exactly where every cable run sits.
Step 2: Check Panel Capacity and Plan Your Basement Circuit Planning
Basement circuit planning answers one question first: does your existing electrical panel have room? A load calculation adds up the power your basement will draw, then compares it to the capacity your panel can supply. If the numbers don’t fit, a subpanel or panel upgrade enters the plan early, not after the drywall.
A typical finished basement uses several circuits:
- A 20-amp circuit for general receptacles in living areas
- Dedicated circuits for a bathroom fan, a sump pump, and any freezer or fridge
- Separate circuits for laundry or a kitchenette, if you add one
- A dedicated circuit for a home theater or AV rack
Wire gauge follows amperage. A 20-amp circuit needs 12/2 cable. A 15-amp lighting circuit can use 14/2. Never mix the two on one circuit.
Canada’s electrical code sets the rules for load calculations, box fill, and circuit protection. For the current requirements, check the Canadian Electrical Code guidance from the Electrical Safety Authority and confirm with your local inspection authority.
Skipping the load calculation is a common basement mistake. A panel that looks fine on paper can trip constantly once a space heater, dehumidifier, and home theater all run at once.
Step 3: Create Your Basement Wiring Diagram and Choose Cable
A basement wiring diagram is the working drawing your electrician and inspector both read. It shows each circuit as a line from the panel to every device, with cable type and amperage labeled. Most guides tell you to make one; few show what belongs on it. Here is the structure that works.
Build it in this order:
- Draw the panel and number each breaker slot, including the spaces you are reserving for future use.
- Trace each circuit from the panel to its rooms and devices, one line per circuit.
- Label cable type on every run: 12/2 for 20-amp circuits, 14/2 for 15-amp lighting.
- Mark box locations with a symbol key (receptacle, switch, ceiling light, dedicated outlet, low-voltage port).
- Note dedicated circuits in a separate color so they are obvious at a glance.
- Add a circuit schedule table beside the drawing (see below).
The circuit schedule is the part people skip. A schedule turns the drawing into something an inspector can check quickly. Use one row per breaker with these columns: breaker number, amperage, cable type, rooms served, devices on the circuit, and notes. A worked example for a typical finished basement might look like this:
- Breaker 1, 15 A, 14/2, living area ceiling lights and dimmer, general lighting.
- Breaker 2, 20 A, 12/2, living area receptacles, general use.
- Breaker 3, 20 A, 12/2, bedroom receptacles and closet light, general use.
- Breaker 4, 20 A, 12/2, bathroom receptacle and fan, ground-fault and dedicated fan.
- Breaker 5, 20 A, 12/2, sump pump, dedicated.
- Breaker 6, 20 A, 12/2, home theater and AV rack, dedicated.
- Breaker 7, 20 A, 12/2, freezer or dehumidifier, dedicated.
- Spare, reserved for a future EV charger or hot tub, with conduit run to the panel now.
The exact numbers depend on your load calculation and local code, but the shape of the schedule does not: every circuit gets a row, every dedicated load gets its own breaker, and every spare gets a label so the next owner knows what it is for.
Choose cable by location, not just by amperage. Amperage sets the gauge, 20-amp circuits need 12/2, 15-amp lighting circuits can use 14/2, and the two should never share a circuit. But a basement adds a second question: where does the cable run? Damp concrete, cold floors, and runs through unfinished utility space all change the rules.
Keep the diagram with your permit documents. Inspectors ask for it, and future renovations depend on it. Label both ends of every cable with the circuit number from the diagram so the panel trim-out goes twice as fast and troubleshooting later takes minutes instead of hours.
Step 4: Master Basement Outlet Placement for Every Room
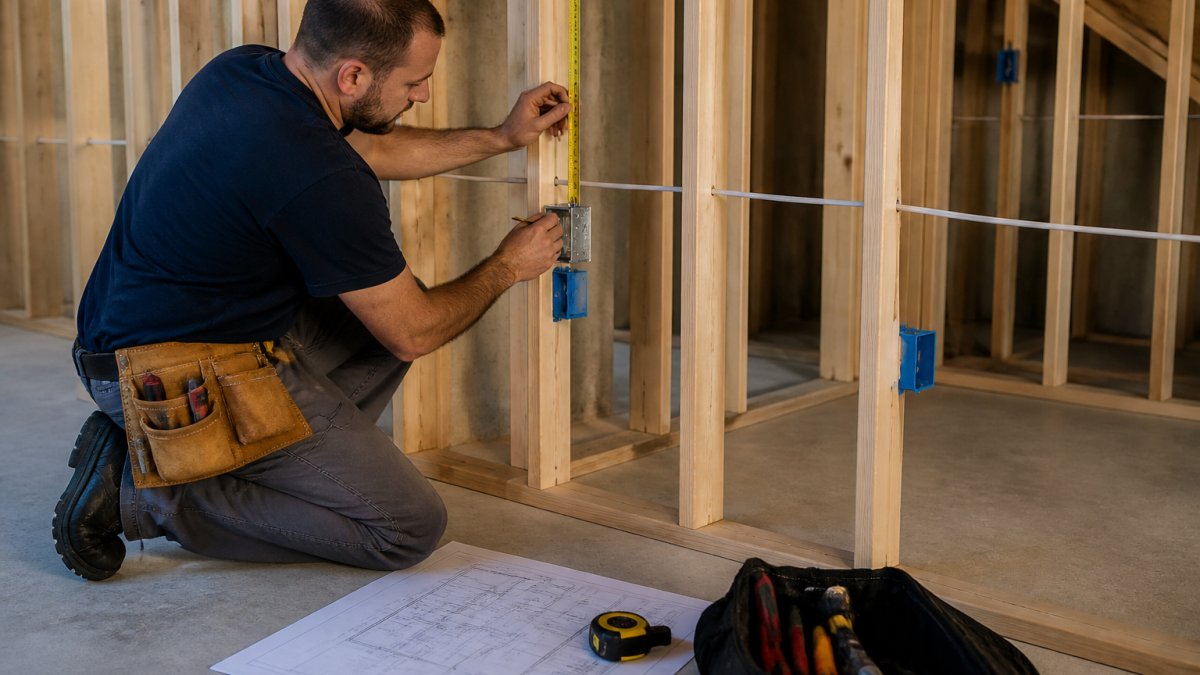
Basement outlet placement follows furniture, not wall symmetry. Place receptacles where lamps, TVs, and chargers actually sit, and you will never need an extension cord again.
Set the heights first. A common pattern is to mount general receptacles so the box center sits about 300 mm above the finished floor, measured to the box center, not the bottom edge. That clears most baseboard profiles and keeps plugs reachable. Exceptions worth planning deliberately:
- Above countertops (bar, kitchenette, workbench): box center roughly 1,050 to 1,100 mm above the floor, or about 200 to 300 mm above the counter surface.
- Desk-height quads in a home office: box center around 750 mm, so cables drop behind the desk instead of looping across it.
- Bedside receptacles: box center around 750 mm, set roughly 150 to 200 mm outside each side of the bed frame so a nightstand does not cover the box.
- Utility and mechanical areas: mount higher, around 1,200 mm, so a sump pit, floor drain, or stored box does not block access.
Resolve furniture conflicts before framing. Walk the plan with the furniture layout in hand and mark every wall where a couch, bookcase, built-in, or bed will sit.
Handle basement-specific locations. Bathrooms need ground-fault circuit-interrupter protection, and receptacles go away from the tub and shower, keep them out of the zones where splashing is possible and confirm the exact distances with your local inspection authority.
Plan for the loads people forget. Add a receptacle for a future dehumidifier and one for a basement freezer; both draw steady power and both get left out of plans.
Use a room-by-room worksheet. Before rough-in, make a simple table with one row per room and columns for wall, mounting height, circuit number, and notes (furniture, damp location, dedicated load).
Outlet placement is the cheapest thing to get right and the most expensive thing to fix. Moving one receptacle after drywall costs far more than adding it during rough-in.
Step 5: Design Your Basement Lighting Layout
A basement lighting layout splits into zones: general light, task light, and accent light. Ceiling lights handle general illumination. Task lighting sits over a desk, bar, or workbench. Accent lighting washes a feature wall or stairwell.
Plan switching around how you walk through the space. Put a switch at every room entrance, and add three-way switches at stair tops and bottoms. Group lights into zones so one switch does not light the whole basement at once.
For a home theater, keep recessed lights on a dimmer and off the screen wall. For a home gym, aim for even overhead light with no glare at eye level.
Pot lights need spacing planned to the ceiling height. Too few and the room feels dim. Too many and the ceiling looks like a grid. Match the layout to the joist direction so the rough-in stays simple.
Step 6: Run Cable and Install Electrical Boxes
Rough-in wiring is the stage where the plan meets the framing. Run cable through drilled holes centered in joists, keep runs parallel to framing where possible, and leave slack at every box.
Follow these steps:
- Drill joist holes at the center line, and keep them away from the top and bottom edges.
- Protect cables with nail plates wherever they pass within reach of a stud face.
- Mount electrical boxes flush with the finished wall depth, accounting for drywall thickness.
- Staple cable within the required distance of each box.
- Label every cable at the panel end before drywall covers it.
Electrical box selection matters. Use boxes sized for the number of conductors and devices they hold, and choose old-work or new-work boxes to match the stage of the build.
Label both ends of every cable with the circuit number from your diagram. The panel trim-out goes twice as fast, and troubleshooting later takes minutes instead of hours.
Step 7: Plan for Permits, Inspections, and Future Upgrades
A finished basement needs a permit in most jurisdictions, and electrical work is inspected at rough-in and at final. Plan the inspection sequence into your renovation timeline so drywall never waits on a failed inspection.
Your permit package should include:
- The floor plan with room labels
- The basement wiring diagram with circuits and cable types
- The load calculation
- A circuit schedule listing each breaker, its amperage, and its loads
Book the rough-in inspection after boxes and cable are installed but before insulation and drywall. Fix any deficiencies immediately, because a re-inspection adds days to the schedule.
Future-proofing costs little at this stage. Run conduit or spare cable to the panel for a future hot tub, EV charger, or home theater upgrade. Add low-voltage conduit for data wiring and smart-home controls while the walls are open.
For permit requirements in your area, check the Electrical Safety Authority’s homeowner permit guidance and Technical Safety BC’s electrical permit information.
Finishing over uninspected rough-in wiring can void insurance coverage and force a tear-out. Never let drywall go up before the rough-in inspection passes.
Frequently Asked Questions
How many circuits does a finished basement need?
A typical finished basement requires at least 4 to 6 dedicated circuits: one for lighting, one for general receptacles, and separate circuits for high-draw appliances like a fridge, microwave, or space heater. If you add a bathroom, home theater, or kitchenette, plan additional 20-amp circuits. Always perform a load calculation and check panel capacity before finalizing your basement circuit planning. A licensed electrician can confirm the exact number based on your layout and appliances.
What is the 2-6-12 rule for electrical outlets?
The 2-6-12 rule is a practical guideline for basement outlet placement: keep outlets within 2 feet of any point along a wall, no more than 6 feet apart, and within 12 feet of any location in the room. This ensures no spot is more than 6 feet from a receptacle. While not a strict code requirement everywhere, it helps ensure convenient access and reduces the need for extension cords. Always follow your local electrical code for specific requirements.
When should electrical wiring be installed during basement finishing?
Electrical rough-in should happen after framing is complete but before insulation and drywall. This allows you to drill joists, run cable, and install electrical boxes without obstruction. Schedule your rough-in inspection before closing walls. If you plan to add future features like a home theater or extra outlets, rough-in the wiring now to avoid costly retrofits later.
Can I run electrical wiring in an unfinished basement myself?
In many jurisdictions, homeowners can do electrical work on their own residence, but a permit and inspection are usually required. However, basement finishing involves complex load calculations, proper cable routing, and code compliance. Mistakes can be costly or dangerous. For a basement wiring diagram and installation, hiring a licensed electrician ensures safety and code compliance. Bighorn Electric offers professional assessments and can guide you through the process.
Planning an electrical layout for basement finishing rewards patience at the drawing stage. Get the room map, load calculation, and circuit schedule right, and every later step gets easier. Bighorn Electric’s licensed, insured, and bonded electricians handle basement rough-in, panel upgrades, and inspection-ready documentation, with a 48-hour on-site response for urgent issues. Book online with Bighorn Electric and start your basement on a plan that passes inspection the first time.


0 Comments